From Seed to Plant | Top 10 Steps for Germinating Seeds to Plants
From Seed to Plant
How to Start Seeds

A step-by-step guide on starting vegetables and flowers from seed. Growing plants from seed is an excellent method to get a head start on gardening early in the season. It is simple to grow from seed to harvest with the correct light and some basic equipment.
Since plants have different seed-starting conditions, it's best to start small by cultivating only a few kinds. Some seeds, such as tomatoes and marigolds, are easy to germinate inside. Basil, zinnia, coleus, nasturtium, and cosmos are other wonderful choices for amateurs. If you're a newbie, start with them and then go on to more picky seeds like petunias.
Here are the basics in 10 steps.
Selecting a container.

Containers for seedlings should be clean, at least 2-3 inches deep, and have drainage holes. Plastic pots, cell packs, peat pots, plastic flats, yogurt cups, and even eggshells can be used. The possibilities are unlimited as long as they are clean (soak in 9 parts water to one part household bleach for 10 minutes).

You may also buy seed-starting kits, but don't spend too much money on them unless you are sure you will be beginning seeds every year. If you sow seeds in tiny containers or plastic flats, seedlings must be transplanted into somewhat bigger pots after they have their first set of genuine leaves. Remember that flats and pots take up space, ensure that you have enough sunspace for all of the seedlings you start. Click here to learn how to make DIY pots and planters.
Begin with high-quality soil.

Sow seeds in a sterile seed-starting mix or potting soil, which may be found at nurseries and garden centers. Garden soil should not be used since it is excessively thick, contains weed seeds, and may contain disease organisms. Before filling seed-starting pots, wet the soil with warm water. Click here to learn how to make your own soil and improve it.
Plant at the appropriate depth.

The planting depth is specified on the seed packaging. The basic rule of thumb is to cover seeds with soil three times their thickness. But be sure to carefully read the planting directions given on the seed packaging. Some seeds, such as lettuce and snapdragons, require light to germinate and should lie on the soil surface while remaining in excellent contact with moist soil.

After seeding, gentle tamping will assist. After you've planted your seeds, re-wet the soil using a spray bottle.
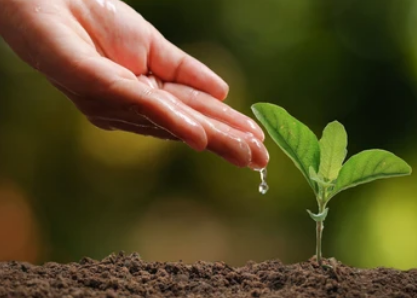
Use water wisely.
Always use water that is at room temperature. Let chlorinated water sit overnight to allow the chlorine to evaporate, or use distilled water. Softened water should be avoided. It is critical to keep the soil wet at all times but avoid overwatering, which fosters diseases that can harm seedlings. Avoid splattering water on the leaves.
To avoid this, as well as overwatering, dip the bottom of your pots in water and let the soil absorb moisture from the bottom until wet. Some seed-starting kits include a wicking mat that transfers water from a reservoir to dry soil. This may be the most error-proof way of watering seedlings since the soil does not become soaked. Whatever you do, do not skip watering your plants and do not allow seeds or seedlings to dry out. It is the death penalty.
Maintain stable moisture levels.
Cover your container before germination to help retain moisture within. A plastic cover is usually included with seed-starting kits. A plastic bag can also be used, but it must be supported so that it does not rest flat on the soil. As soon as the seeds sprout, remove the coverings. Reduce watering so that the soil partially dries up, but do not allow the seedlings to wilt.
Keep the soil warm.
Warm soil is required for seed germination. In cold soils, they germinate slowly or not at all. Most seeds will germinate at temperatures around 78°F. Waterproof heating mats, specially developed for germinating seeds, maintain a consistent temperature in the soil. They are available at most nurseries and garden centers.
Alternatively, seed trays can be placed on top of a refrigerator or other warm appliance until the seeds sprout. The air temperature should be a little lower than 70°F after germination. Seedlings may tolerate air temperatures as low as 50°F as long as the soil temperature maintains between 65 and 70°F.Click here to learn more about soil improvement.
Fertilize.

Feed your seedlings regularly when they have developed their second set of true leaves, using a half-strength liquid fertilizer. Apply it gently to avoid dislodging the seedlings from the soil. After four weeks, every alternate week, apply full-strength liquid fertilizer until transplanting.
Give seedlings plenty of light.
Lack of light results in long, towering seedlings that struggle if transplanted outside. Stocky seedlings can be grown in a sunny south-facing window in moderate winter climates. Even a south-facing window may not offer enough light farther north, especially during wintertime. For the best development, seedlings require 14-16 hours of direct sunshine every day.

If seedlings begin to bend toward the window, this is an indication that they are not getting enough light. Simply rotating the pots will not suffice; you may need to provide artificial illumination. Lighting kits are available from nurseries and mail-order seed catalogs. Pay close attention to the instructions.
Air circulation
Circulating air aids in disease prevention and promotes the growth of robust stems. To enhance airflow, place a moderate fan near the seedlings. Place the fan at a safe distance from the seedlings rather than immediately blasting them.
Hardening off seedlings

Before transplanting seedlings outside, they must be accustomed to their new, harsher environment. This is known as "hardening off." Place the seedlings in a sheltered area outside (partly shaded, out of the wind) for a few hours about a week before you want to plant them in the garden, bringing them in at night. Gradually expose them to more and more sunlight and wind over a week or ten days. Plants can be hardened off in a cold frame.


Comments
Post a Comment